When a guest submits the RSVP form, your website sends an email notice. By default it goes to your account email, but you can change it or add a second address — for example your partner's, or your wedding planner's. On the free plan you get full detail for the first notices; with the Pro plan, notices are unlimited. This setting belongs to your account, so it applies to every website you own, not just this one.
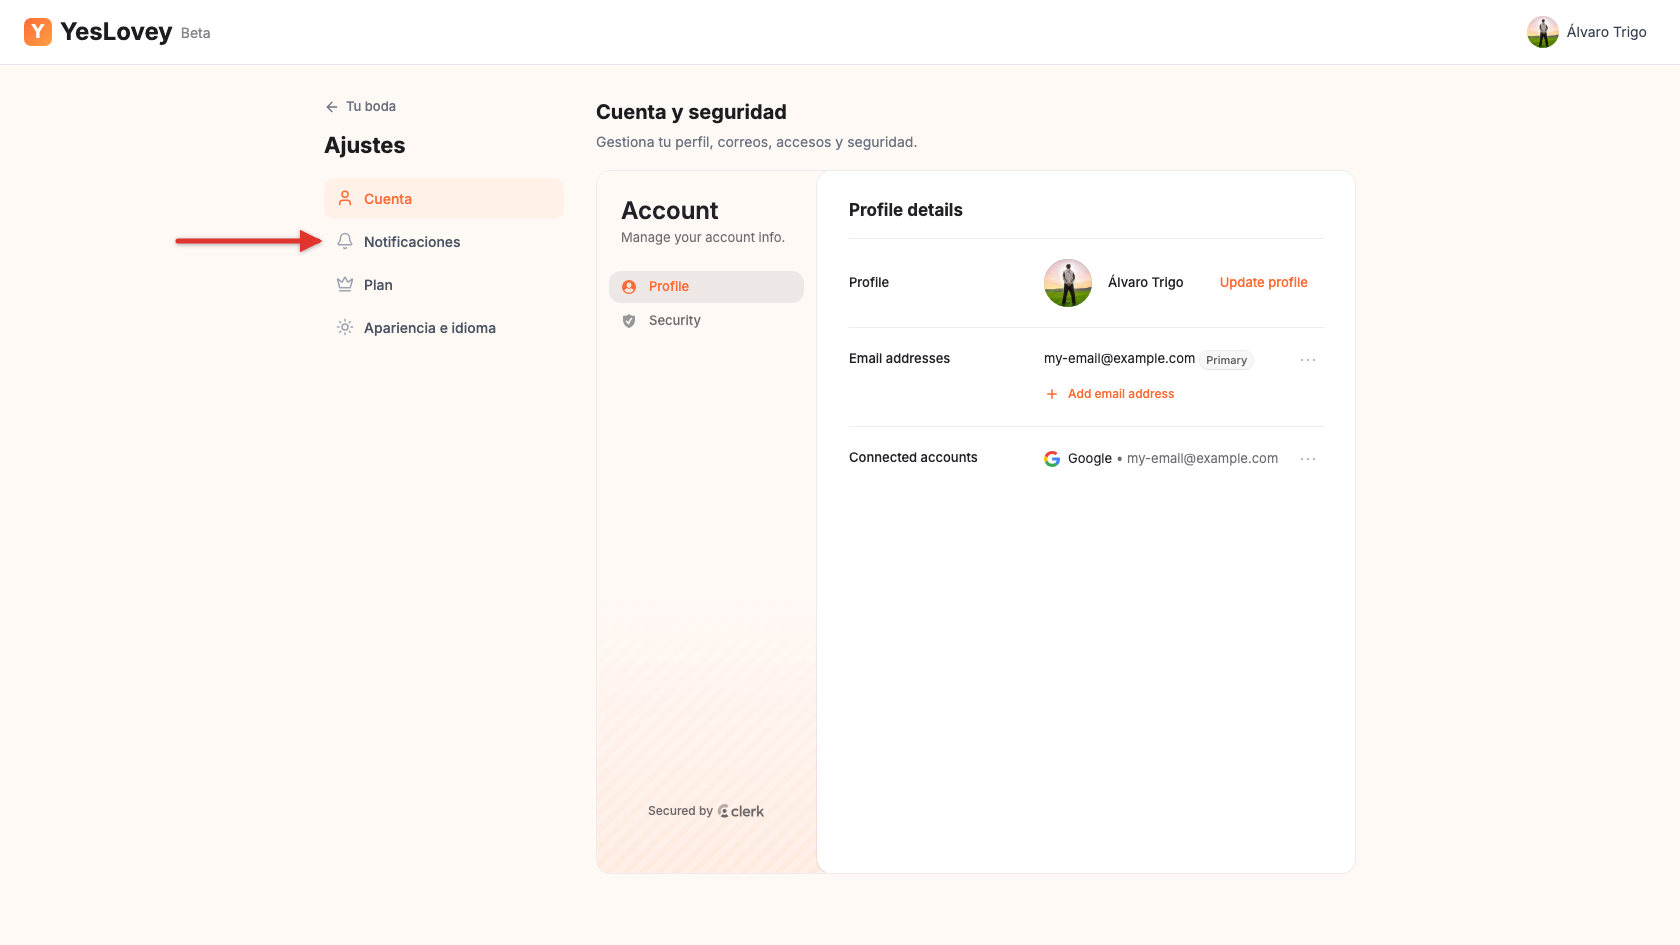
Open the notification settings
- Once you're logged in, click your avatar, top right of your dashboard.
- Go to Manage Account.
- Open the Notifications tab.
Change the current address
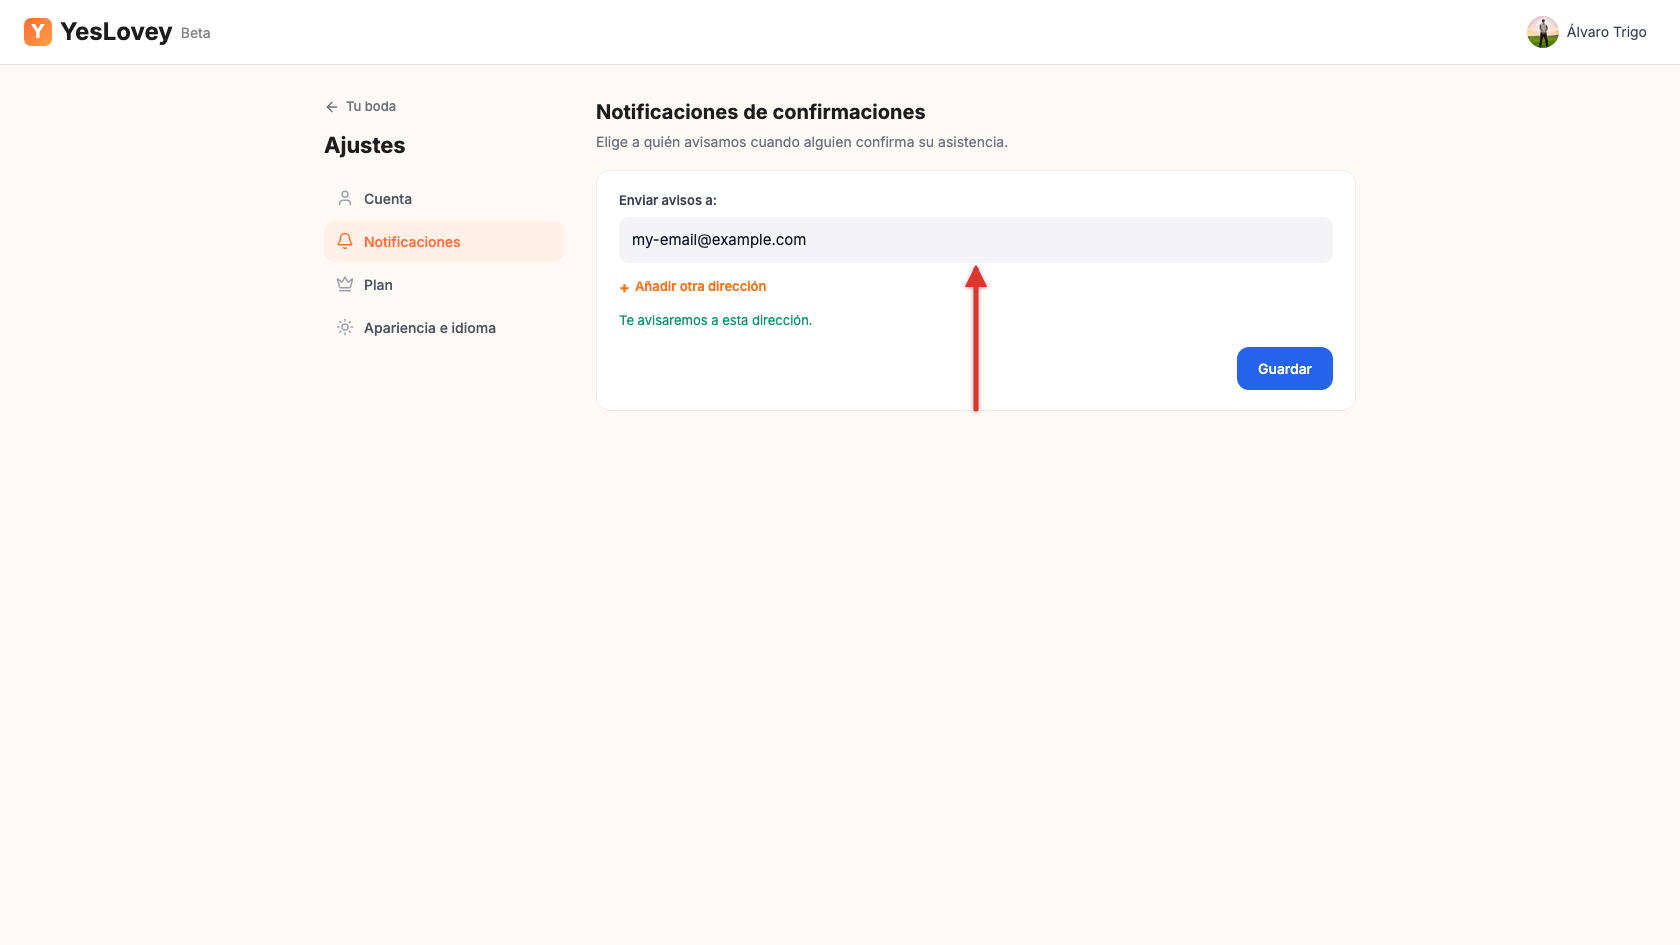
Under Send notifications to: you'll see the email that currently receives RSVP notices.
- Edit the field with the new address.
- Click Save.
From then on, that's the address that will receive RSVP notices.
Add a second address
You can have up to two addresses receiving notices at once.
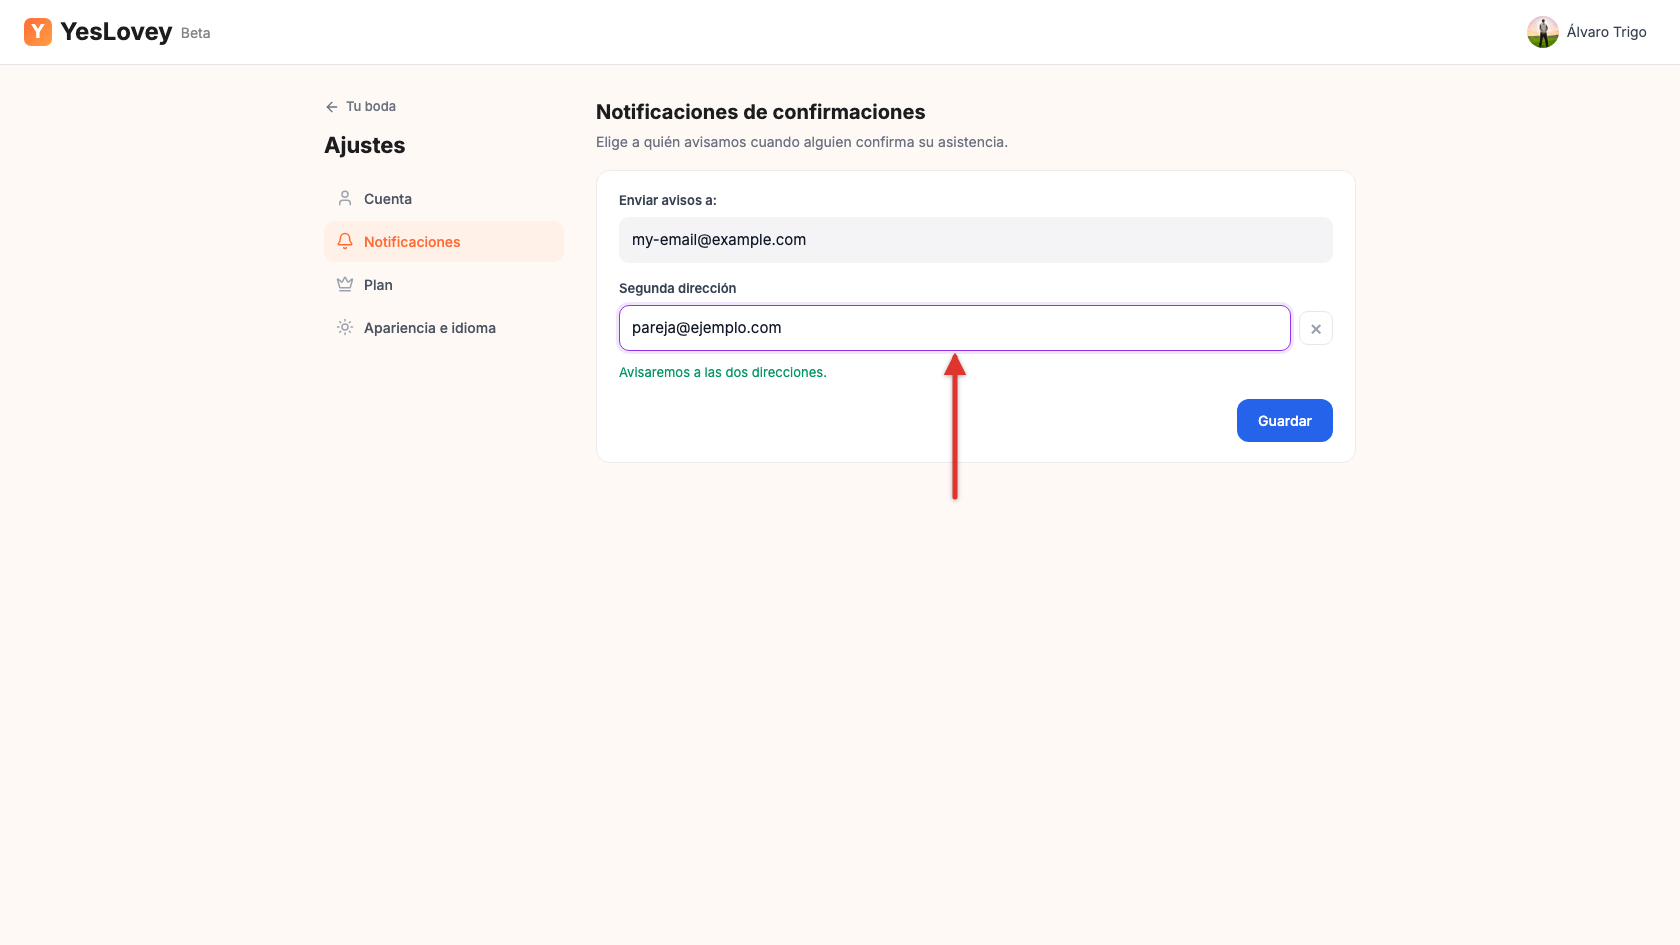
- Click Add another address.
- Type the email into the Second address field that appears.
- Click Save.
To remove the second address, click the "×" button next to the field (its accessible label reads Remove address) and save again.
You can also clear both fields and save — then no one receives the notices (the UI warns you before you save).
Nothing is applied until you click Save — feel free to type without worrying about mistakes. If the email isn't valid, you'll see an inline error and won't be able to save until you fix it.
On mobile the steps are exactly the same; the settings menu just becomes a horizontal row instead of a sidebar.