Guests from different countries? You can publish your wedding website in several languages so each of them reads it in their own. Translation is automatic, and you can fine-tune it by hand, phrase by phrase.
Add a language
- In the editor, click Publish in the top bar and, in the panel that opens, click Languages.
- The Your website's languages window opens, with your Original language marked as Default.
- Click Add language and pick one or more languages from the list.
- Click Translate. The translation runs on its own in a few seconds, and each language then shows as Translated.
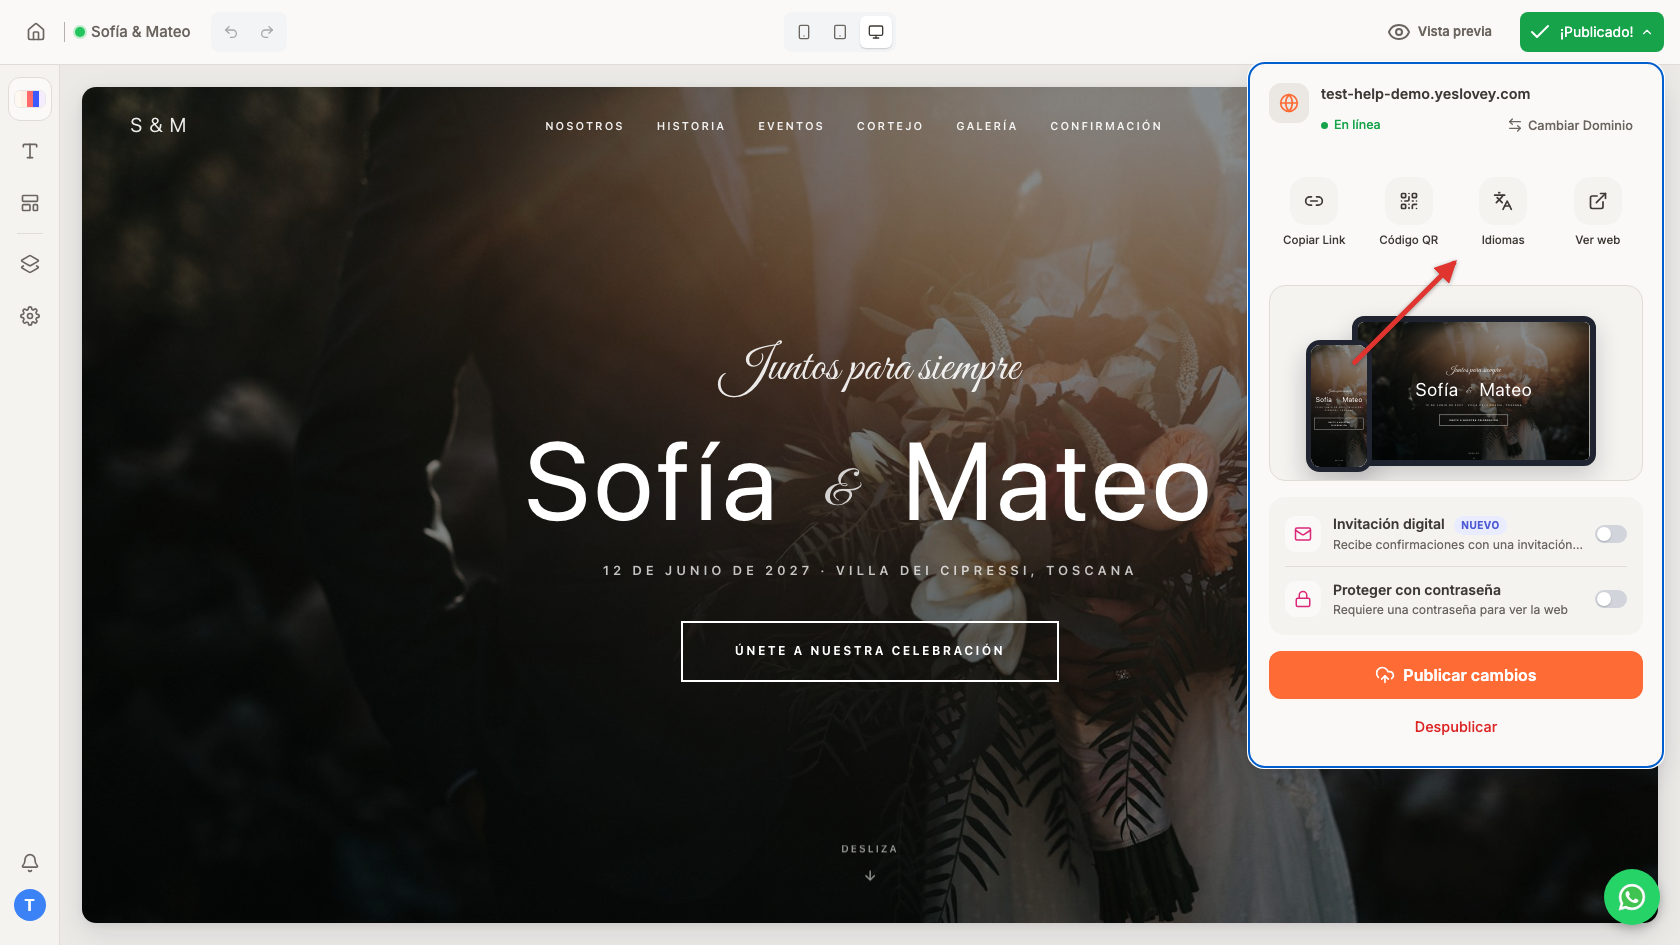
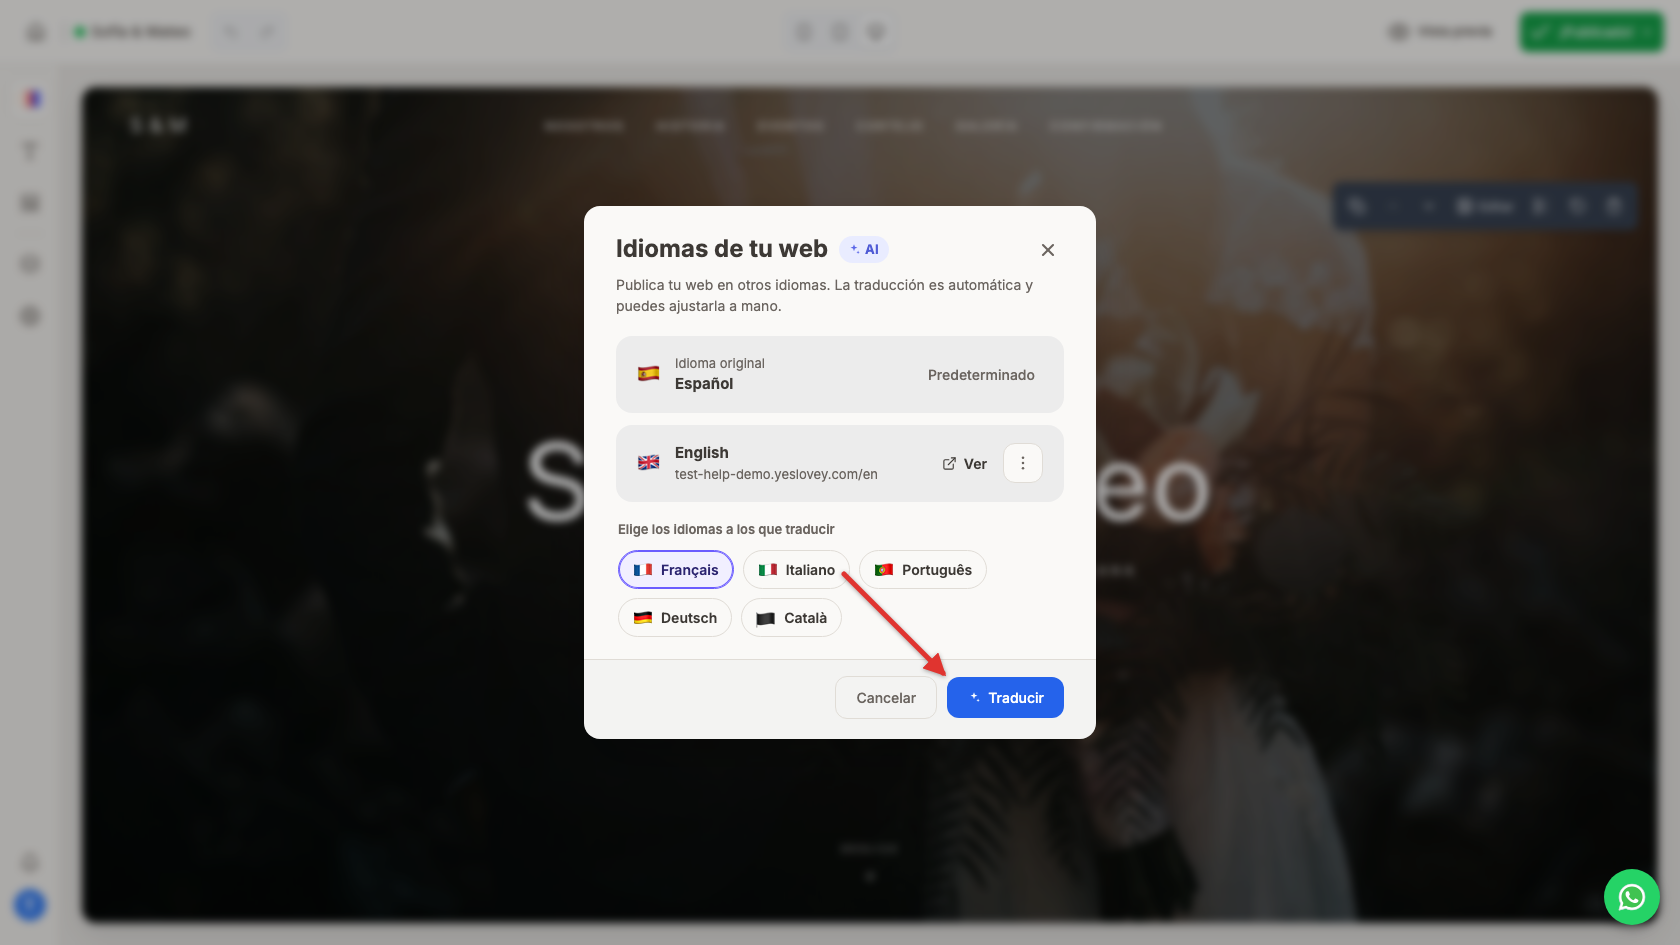
On a phone the steps are the same: the Languages window fills the screen.
Fine-tune a translation
The automatic translation reads very naturally, but names, places or a phrase that's very much your own may deserve a touch-up:
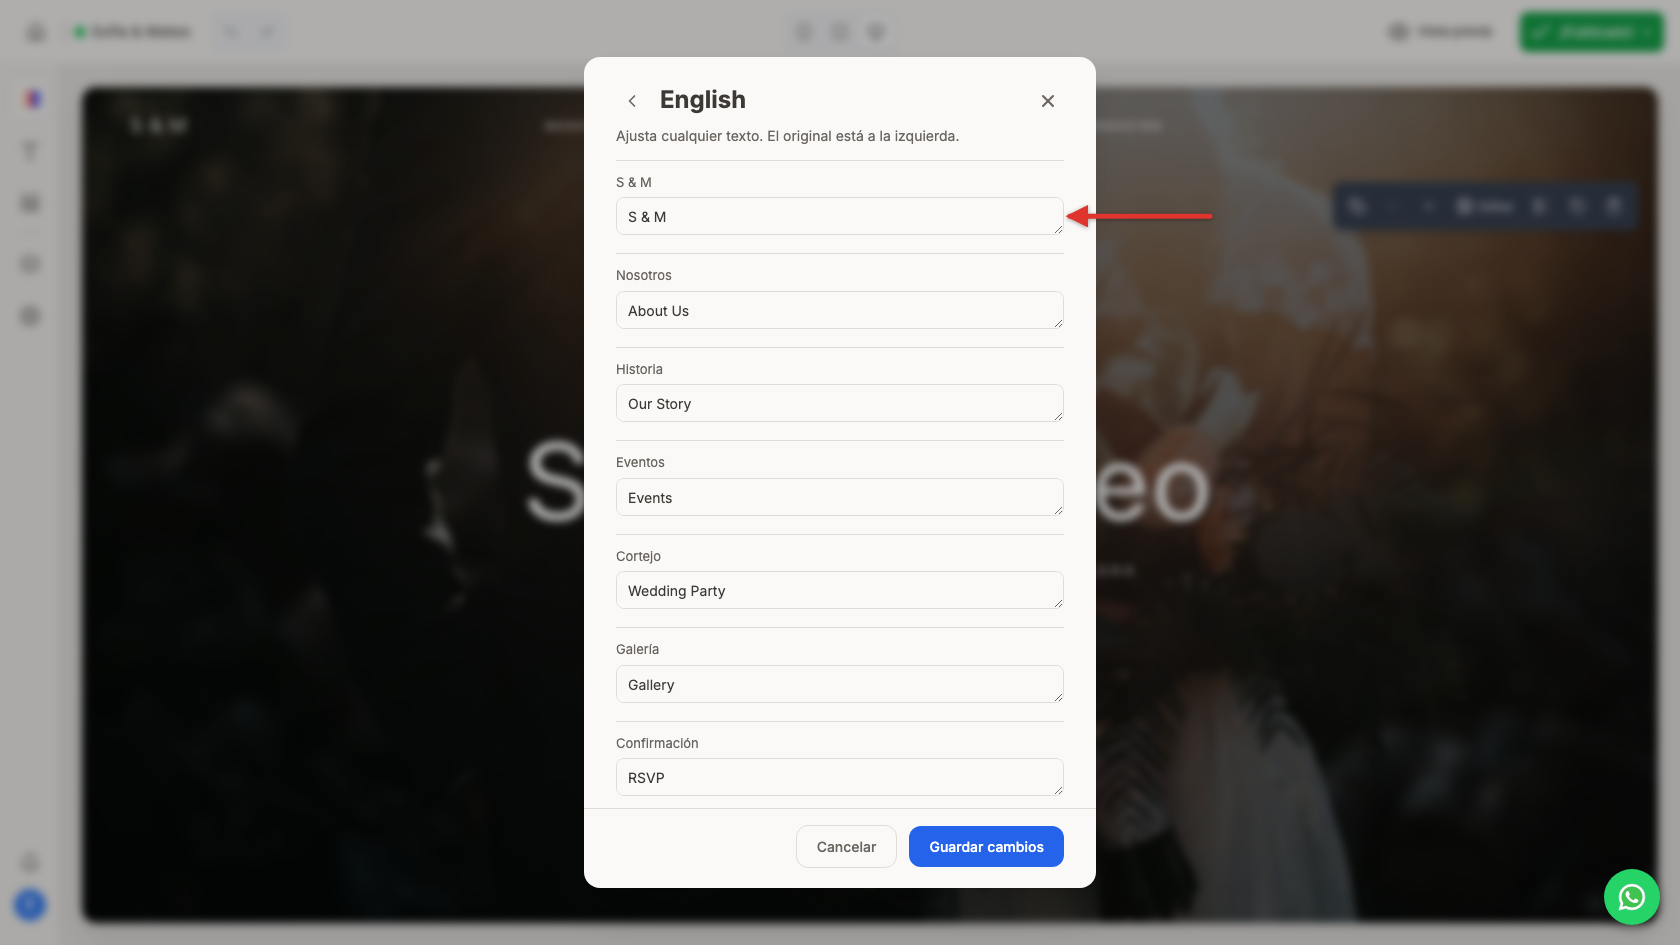
- On the language's row, open the menu and choose Edit translation.
- You'll see each original text next to its translation, ready to edit.
- Change whatever you like and click Save changes.
How your guests see it
Each language publishes to its own address: the original at your usual link, and each translation with the language suffix at the end (for example /en/ or /fr/). Use View on a language's row to open the translated page, or Copy link to share it directly with the guests who need it. When you're finished, click Done.