If you'd rather your wedding website wasn't visible to anyone who stumbles on the link, you can protect it with a password: only people who know it — your guests — will be able to open the page and RSVP. You can turn it on, change it or remove it any time from the publish panel.
Set a password
Password protection lives inside the Publish panel, alongside the rest of your published website's settings.
- Go to your wedding website and open the editor.
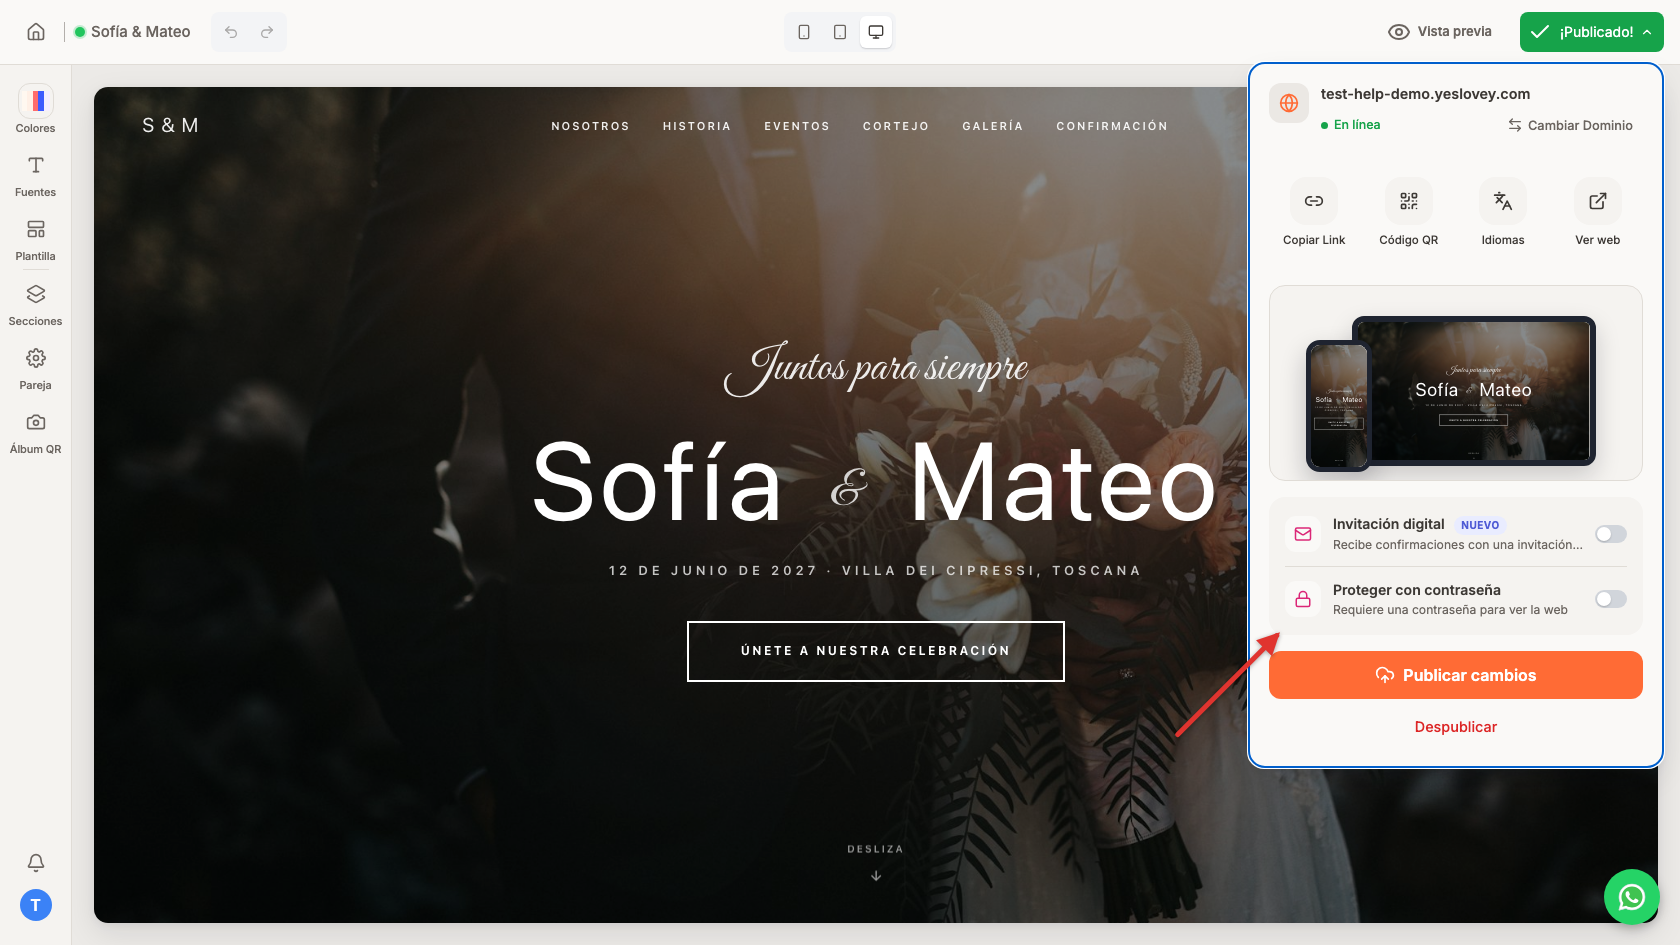
- Click Publish in the top bar to open the publish panel.
- In the panel's settings, turn on the Password protect toggle (you'll recognize it by the lock icon).
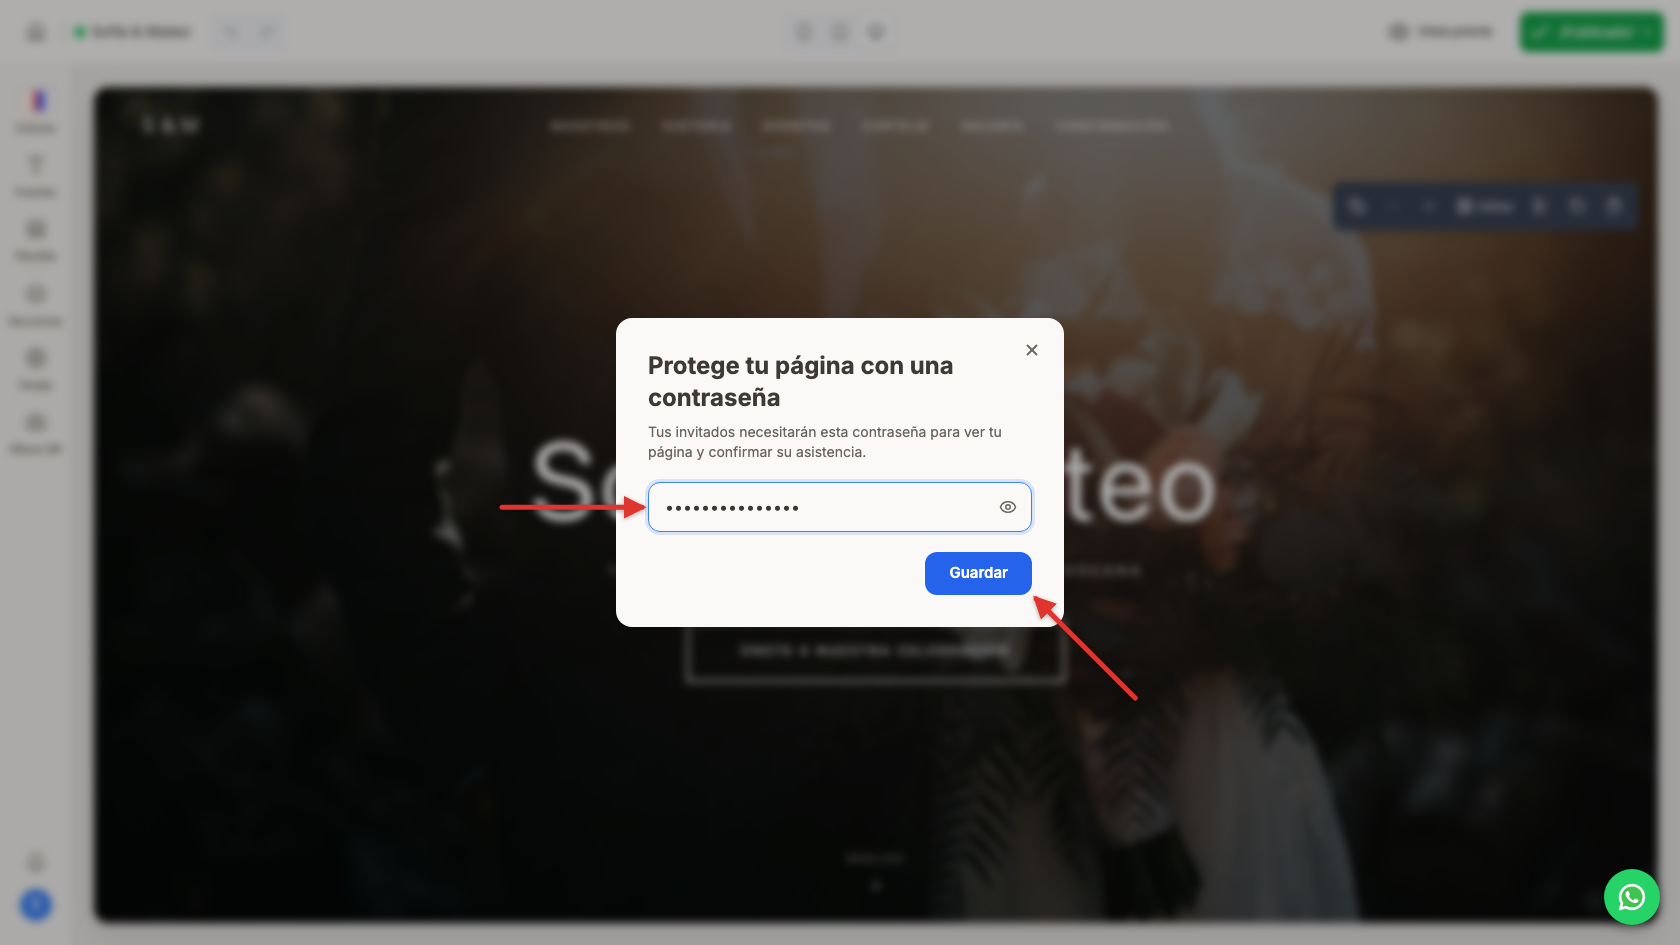
- In the Protect your page with a password window, type the password you want. It must be at least 4 characters; click Show password if you want to check what you're typing.
- Click Save. You'll see the Password protection enabled notice and your website will be protected instantly.
- Go to your wedding website and open the editor.
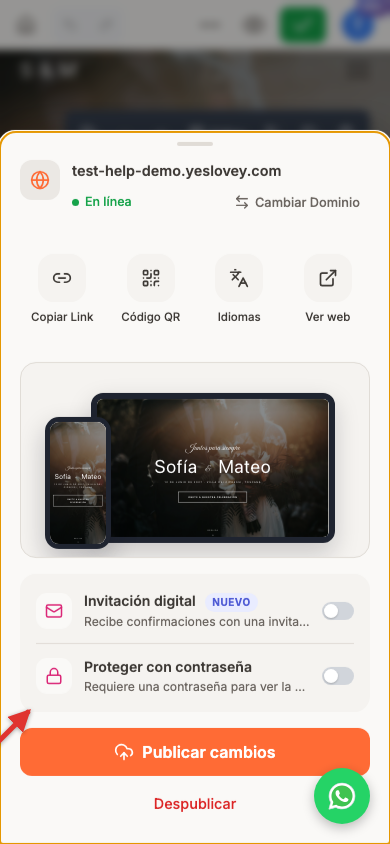
- Tap Publish to open the publish panel.
- Turn on the Password protect toggle (with the lock icon).
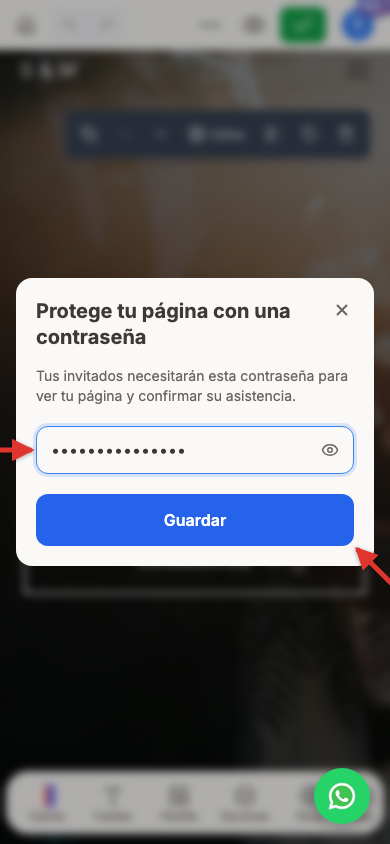
- In the Protect your page with a password window, type a password of at least 4 characters and tap Save.
Change or remove the password
Go back to the Publish panel and open Password protect again. The window now shows Your page is password protected, from where you can:
- Change it: type a new password and click Save. Keep in mind guests who already had the old one won't be able to get in until you share the new one with them.
- Remove it: click Remove password so anyone with the link can view your website again. You'll see the Password protection removed notice.
What your guests see
When someone opens your protected website, instead of the page they'll see a Protected page screen asking for the password. After typing it and clicking Enter, they access the website and the RSVP form as normal. If they get it wrong, they'll see the Incorrect password message and can try again.